The SmarterToons User Guide
A complete, plain-English walkthrough of the Studio — from your first universe to a published episode, and everything monetization, collaboration, and account-related in between.
Creating your account
Sign up with just an email address and a password (at least 8 characters). There's no separate email verification step to get through — you land straight in the Studio, on an empty dashboard, ready to create your first universe.
If someone shared a referral link with you (a URL containing /r/ and a code), open it before you register — it's remembered automatically and applies their referral relationship to your new account. There's nothing to type in by hand for that part.
Signing back in later just takes your email and password. If you've turned on two-factor authentication, you'll also be asked for a 6-digit code from your authenticator app — see Account and security below.
Forgot your password? Click Forgot your password? on the Log in page and enter your email — you'll get a reset link by email that lets you set a new one, no need to contact support. And on any page where you type a password, click the eye icon inside the field to check what you actually typed before submitting.
- 1Go to the Register page and enter your email and a password.
- 2Submit — you're signed in immediately, no email confirmation to wait for.
- 3From then on, use Log in with the same email and password.
Your dashboard
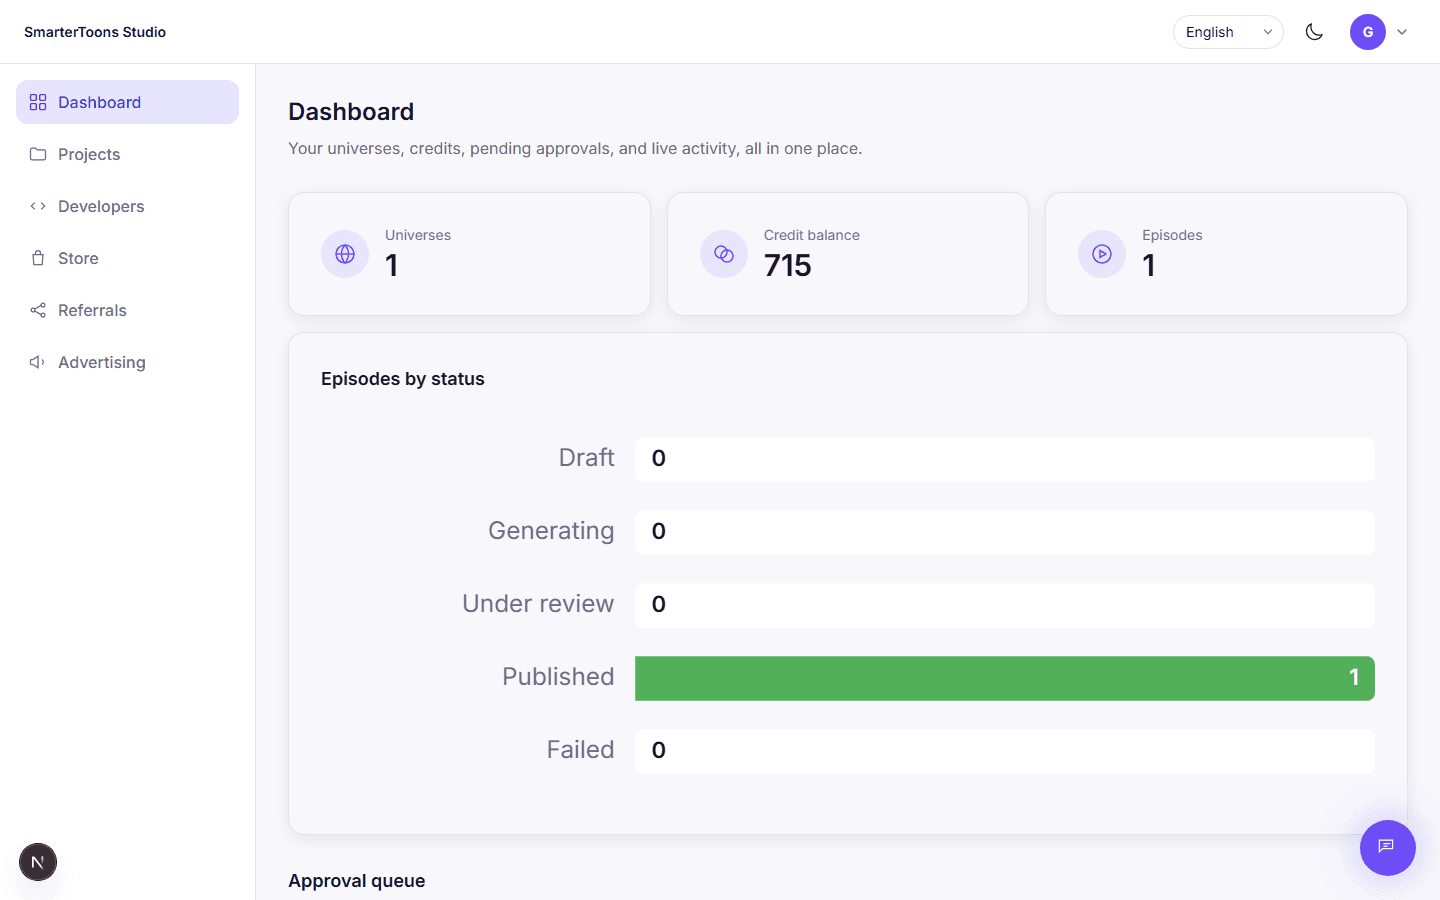
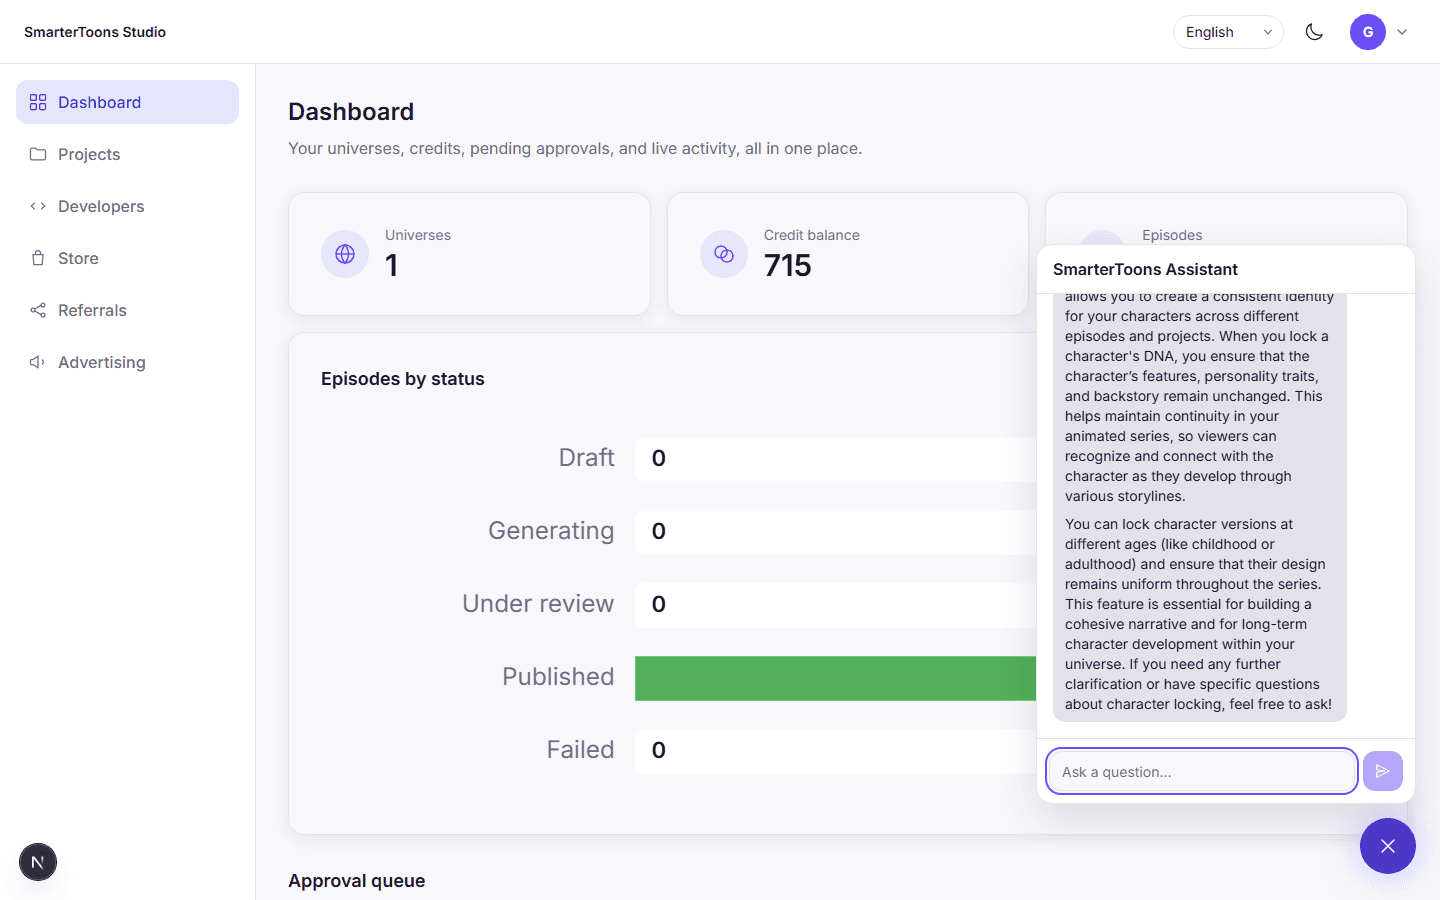
The dashboard is the first thing you see after signing in. It gives you a single-glance summary of your account: how many universes you've created, your current credit balance, and how many episodes you have in total.
Below that, three live panels track your work as it happens: a breakdown of your episodes by status (draft, generating, under review, published, failed), an approval queue for anything waiting on your sign-off, and a live activity feed that fills up in real time while a generation job — a script, a video render, narration — is running.
Notifications
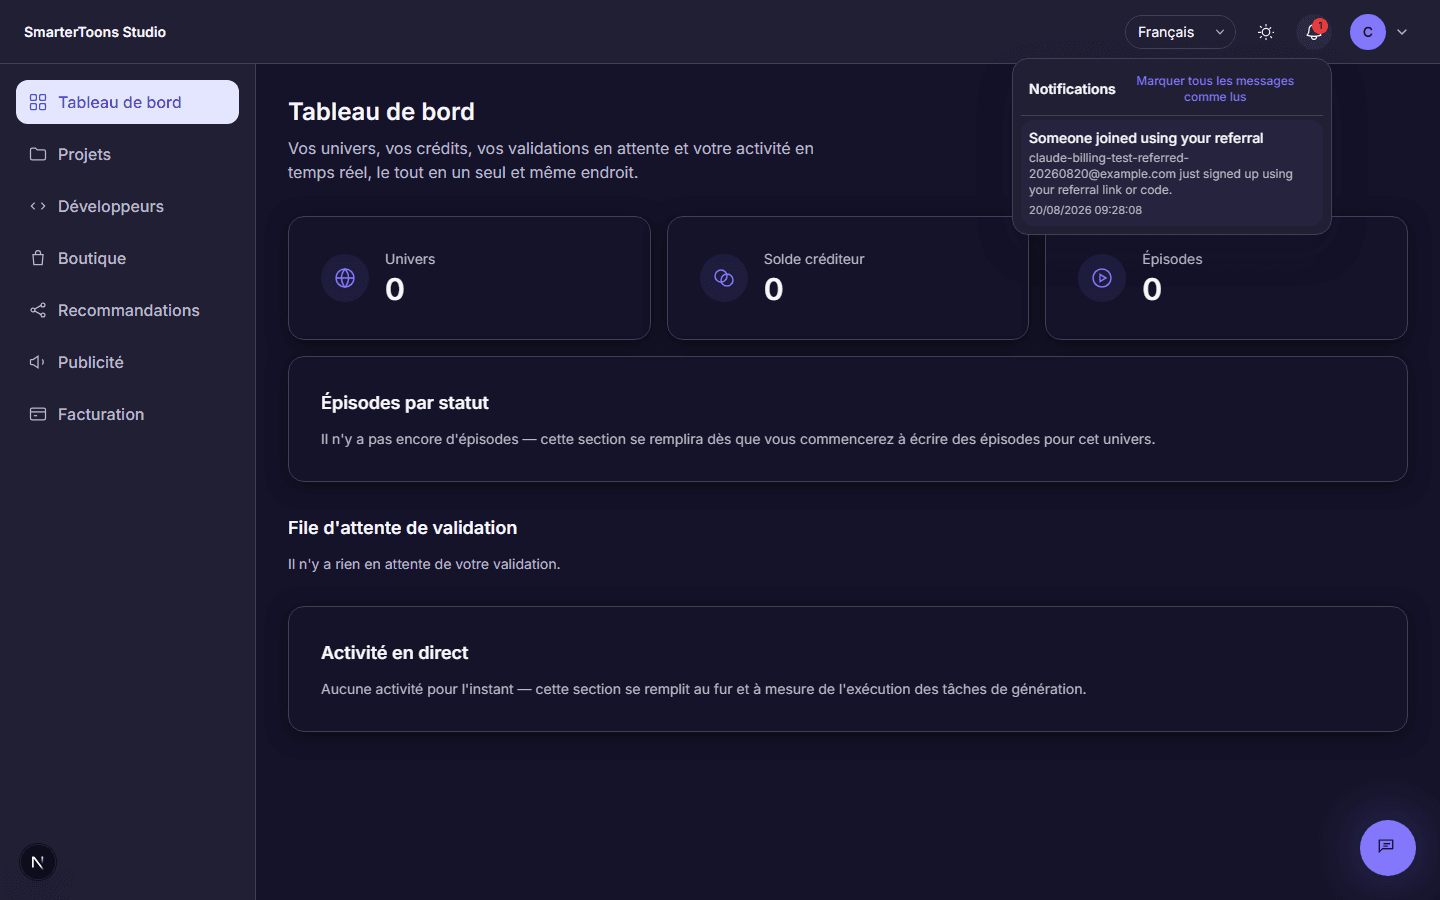
The bell icon in the top bar, visible from every page in the Studio, is your notification center. It shows a badge with your unread count and opens a list covering things worth knowing about even if you're not looking at the page they happened on — someone signing up through your referral link, a payout request being approved or rejected, and similar account-level events.
Notifications are internal to the Studio — they don't replace the emails SmarterToons already sends you for the same events, they just also show up here for as long as you keep the tab open. Mark them read individually, or use Mark all as read to clear the badge in one click.
Creating a universe
In SmarterToons, a "universe" is a project: it holds every character, the series bible, and every episode that belongs to it. Everything about a universe stays consistent from the moment you create it — that consistency is the whole point of the platform.
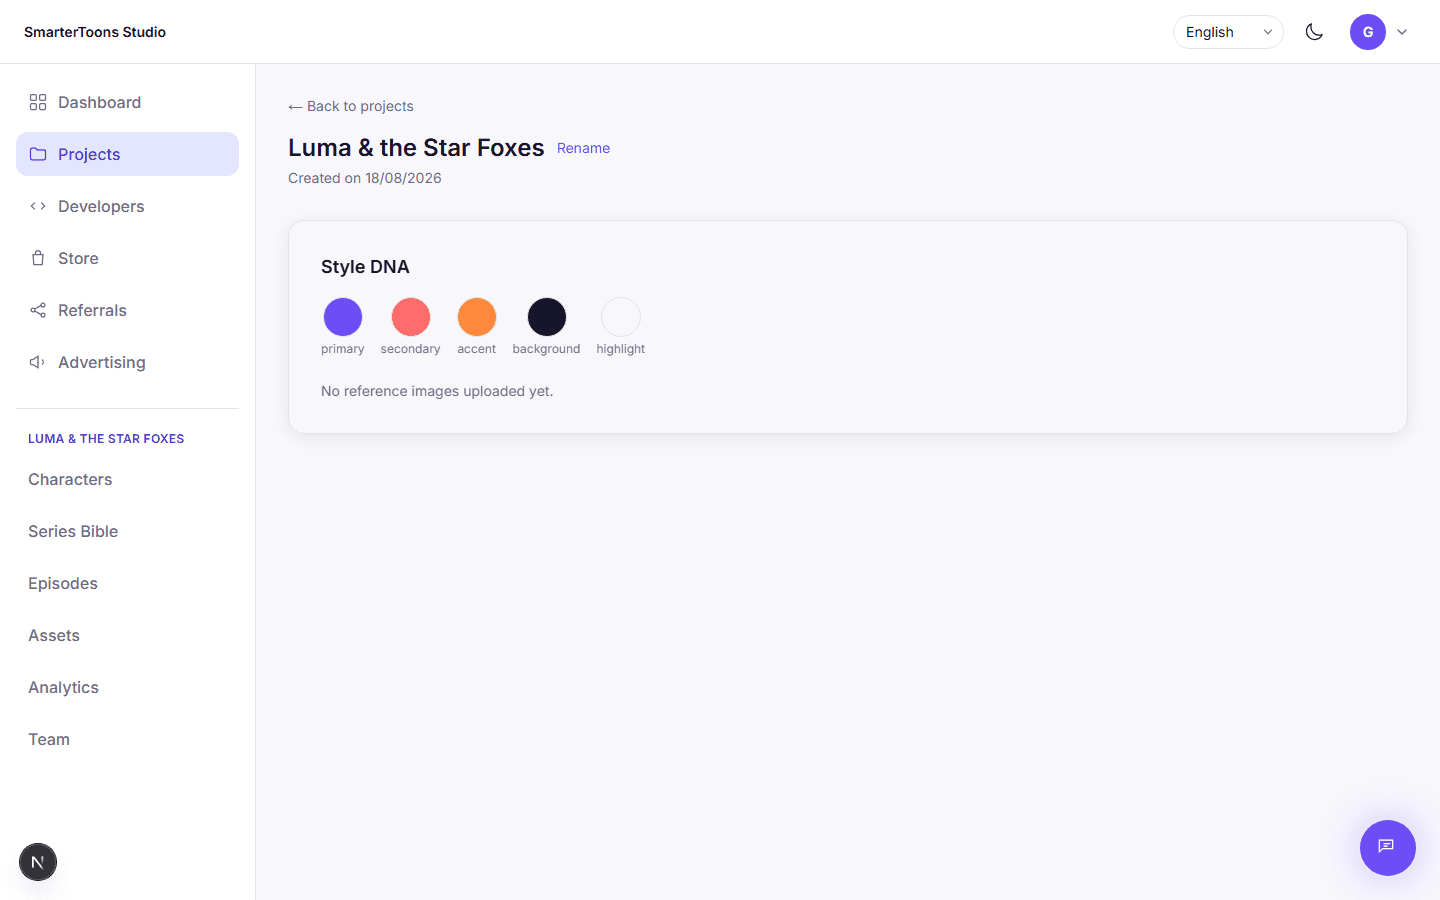
Creating one takes a short wizard: name it, then optionally set its Style DNA — a color palette and reference images that define its visual identity. You can skip Style DNA at creation and add it later from the project page.
- 1Open Projects in the sidebar and click New project.
- 2Give your universe a name.
- 3Optionally set a Style DNA palette and upload reference images — or skip this and add it later.
- 4Confirm, and you're taken straight into your new universe.
Character DNA
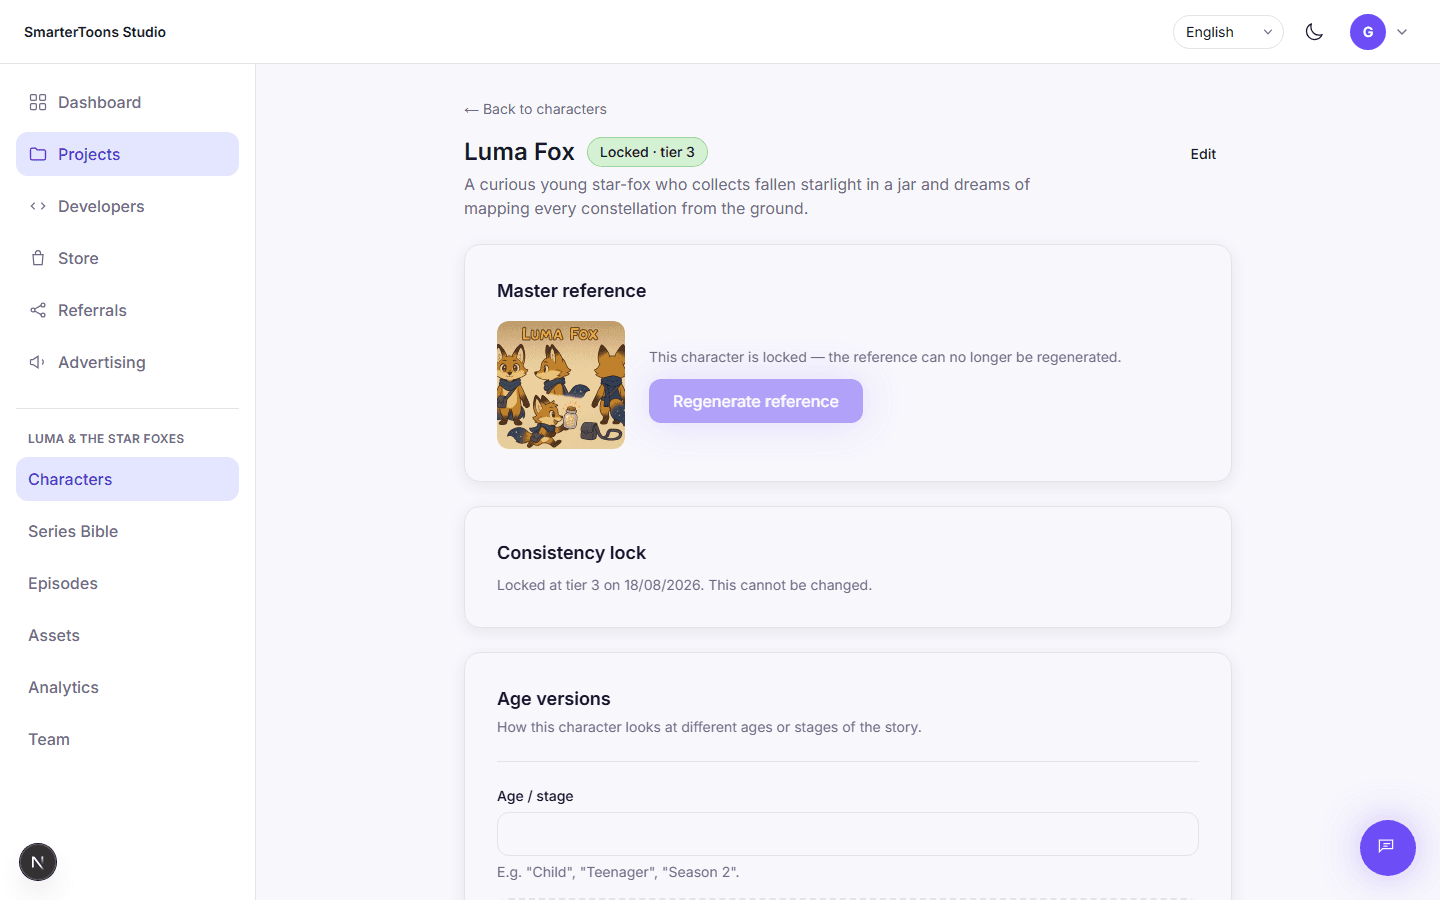
Every character has a DNA workspace built around one problem: keeping them looking and sounding exactly the same across dozens of episodes. It starts with a master reference image — generated from the character's name and bio — that becomes the visual anchor everything else is checked against.
Once you're happy with a character's reference, you can lock it at one of four consistency tiers, from 1 (loose) to 4 (strict). Locking is permanent — a locked character's reference can no longer be regenerated — so it's worth waiting until the design is right.
Beyond the reference, each character carries a bio, an optional voice profile (an ElevenLabs voice ID used for narration and dubbing), age or stage versions for characters who change over a series, and relationships to other characters in the same universe.
- 1Open a universe, go to Characters, and click New character.
- 2Give them a name and a short bio — the bio feeds directly into the reference image prompt.
- 3Generate a master reference, regenerating as needed until it looks right.
- 4Lock the character at a consistency tier once you're satisfied — this can't be undone.
- 5Optionally add a voice profile, age versions, and relationships to other characters.
The relationship graph
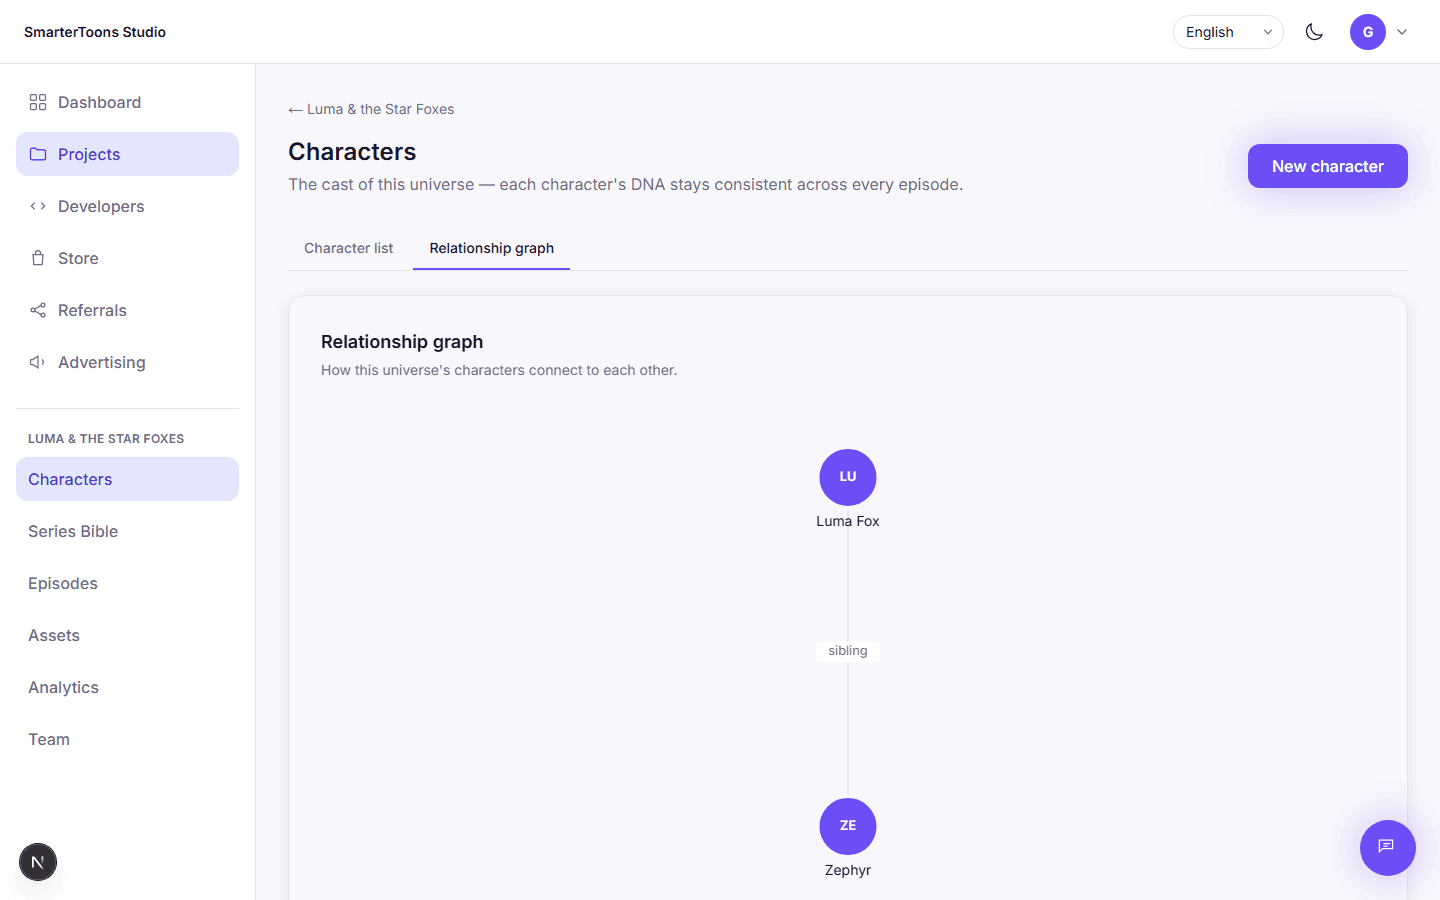
As a universe grows past a couple of characters, the Relationships tab visualizes how everyone connects — siblings, rivals, mentors, whatever you define — as a graph rather than a list. It's a quick way to sanity-check a cast before you start writing episodes that depend on those relationships.
The series bible
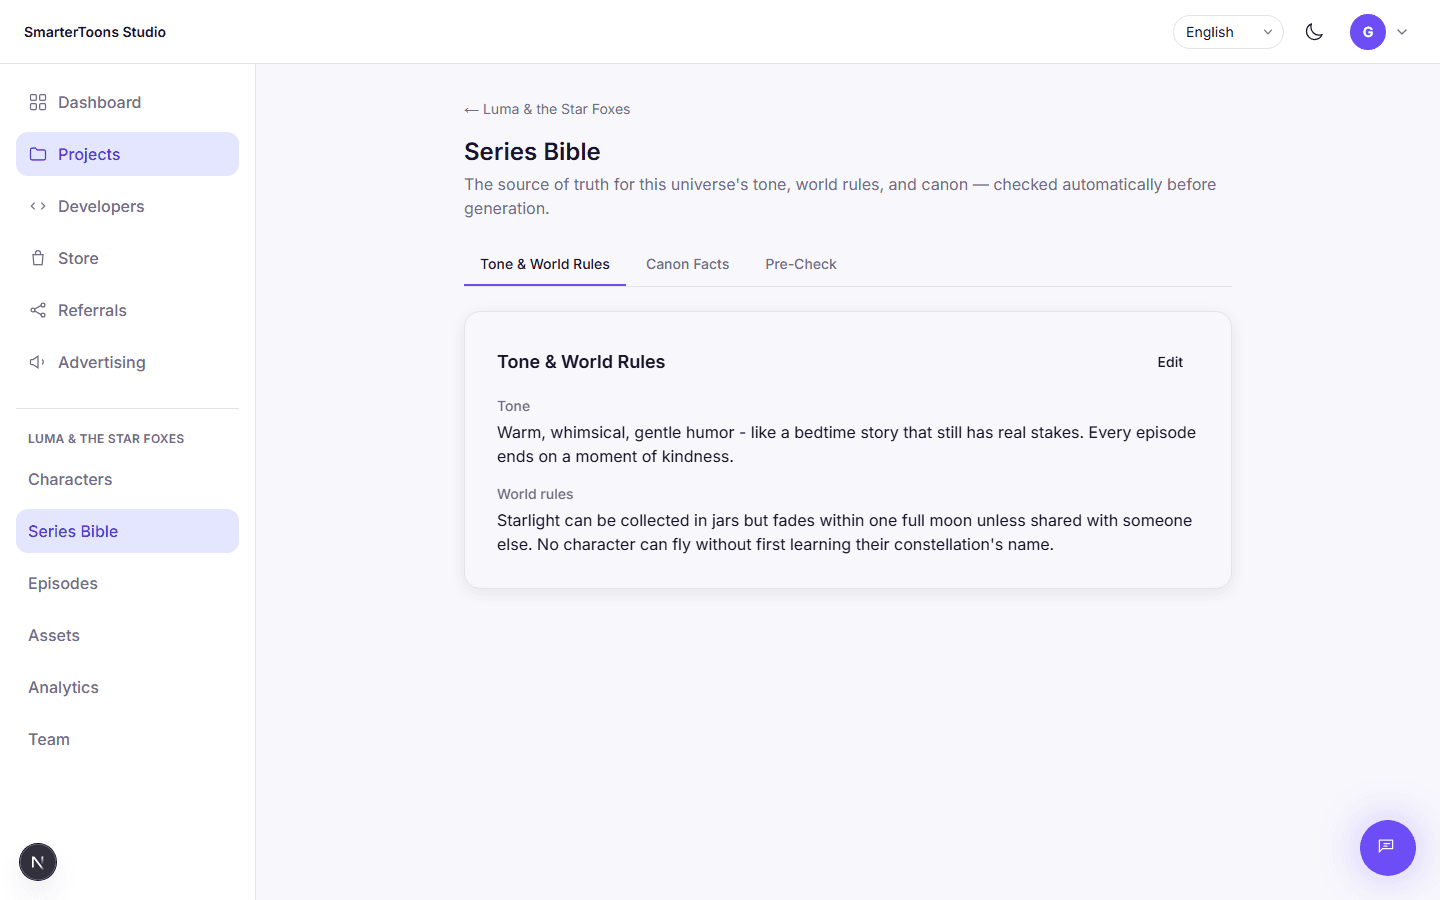
The series bible is your universe's source of truth: its tone, its world rules, and a running list of canon facts. Tone and world rules are free text — write them the way you'd brief a human writer, since that's effectively what they do: every episode's generation reads them.
Canon facts are more structured. Each one is a short statement, optionally tied to a specific character and to a status for that character (alive, deceased, and so on). Before generating an episode, you can run a pre-check against a chosen set of characters — it flags anything that would contradict an established canon fact, before you spend credits generating something you'd have to throw away.
- 1Set your universe's tone and world rules in plain language.
- 2Add canon facts as your story develops — link them to a character when relevant.
- 3Before generating a tricky episode, run a pre-check against the characters involved.
Writing an episode
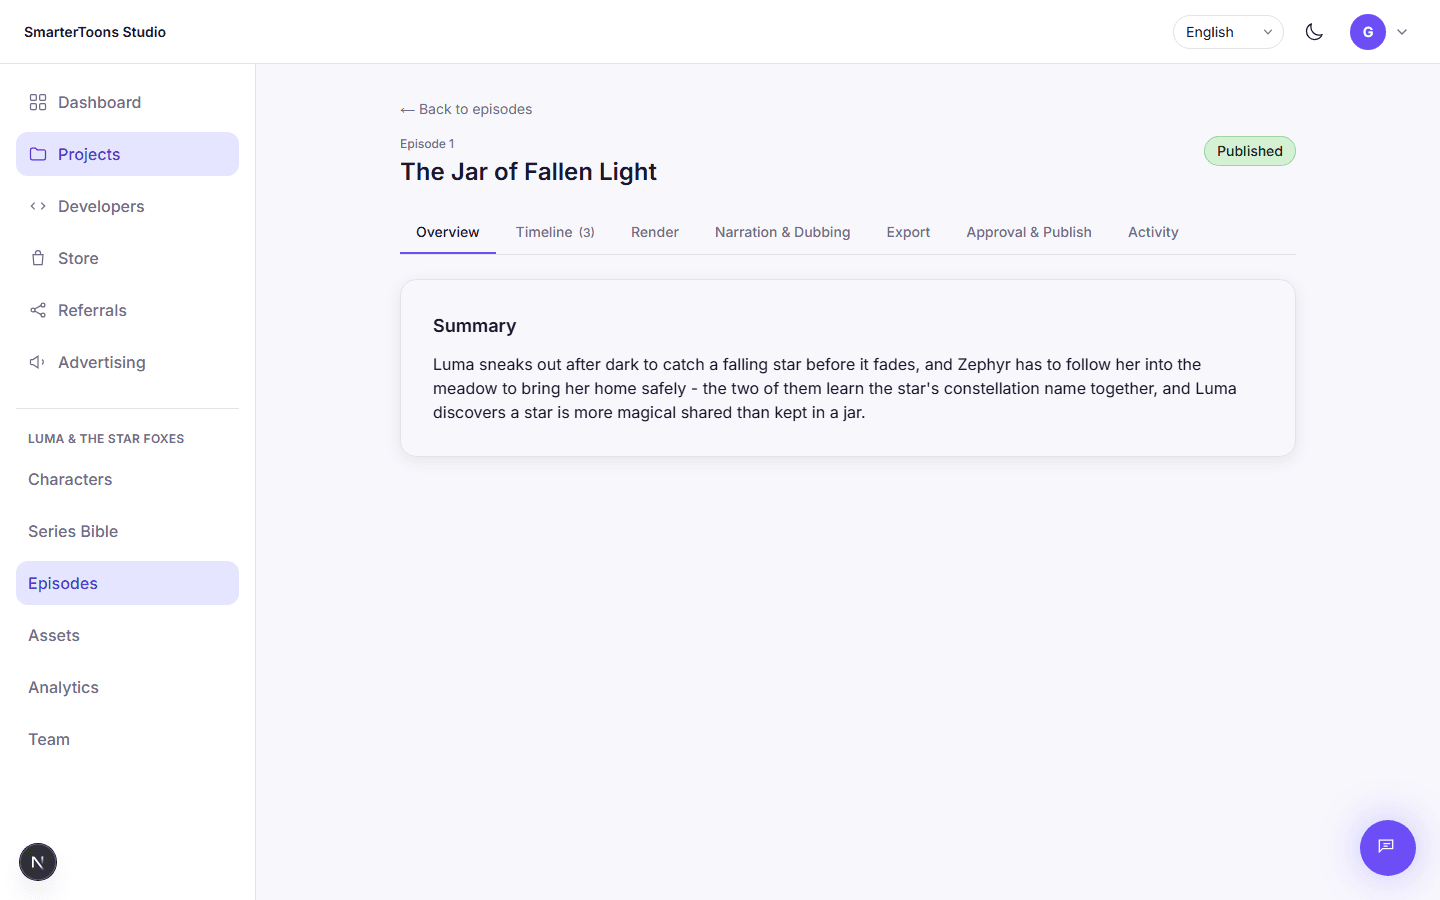
An episode starts as a number, a title, and a summary — the summary is the seed the generator turns into a full script and storyboard. Generation produces a shot-by-shot storyboard automatically; how many shots you get depends entirely on how the story breaks down, so a longer or more eventful summary naturally produces more shots.
Generation and video rendering are billed separately, on purpose: writing a script and storyboard is comparatively cheap, while rendering real video per shot is the most expensive step in the whole pipeline. That split means you can iterate on a script for very little before committing to a full render.
- 1From a universe, open Episodes and click New episode.
- 2Give it a number, a title, and a summary of what happens.
- 3Click Generate — this produces the script and a storyboard image for every shot.
The timeline
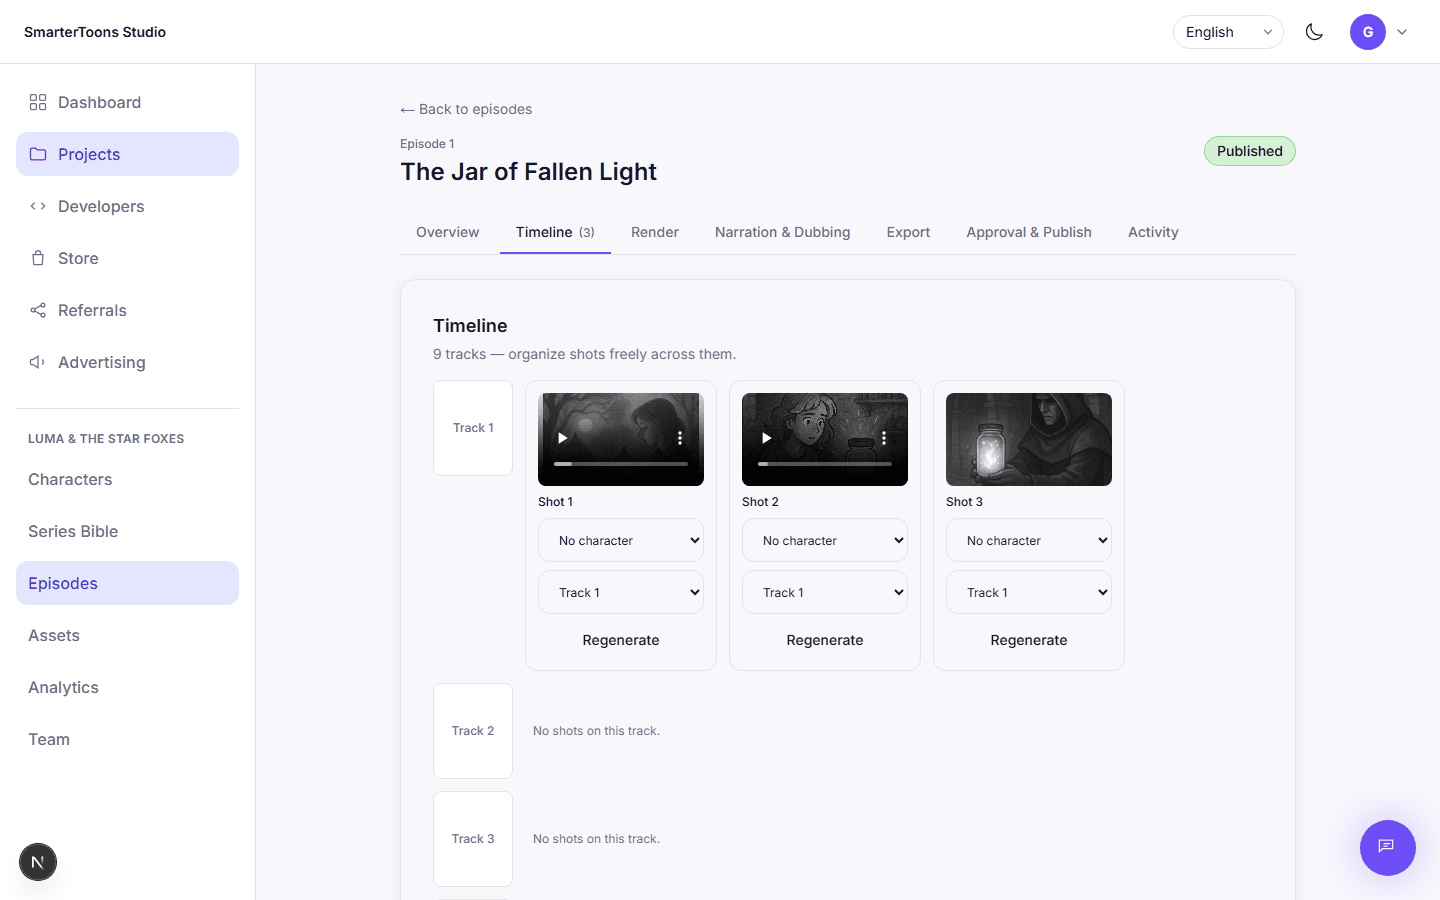
Once an episode is generated, its shots land on a 9-track timeline that you're free to rearrange. Each shot can be reassigned to a different character, moved to a different track, or regenerated individually if a single storyboard image doesn't work — you don't need to regenerate the whole episode to fix one shot.
Rendering video
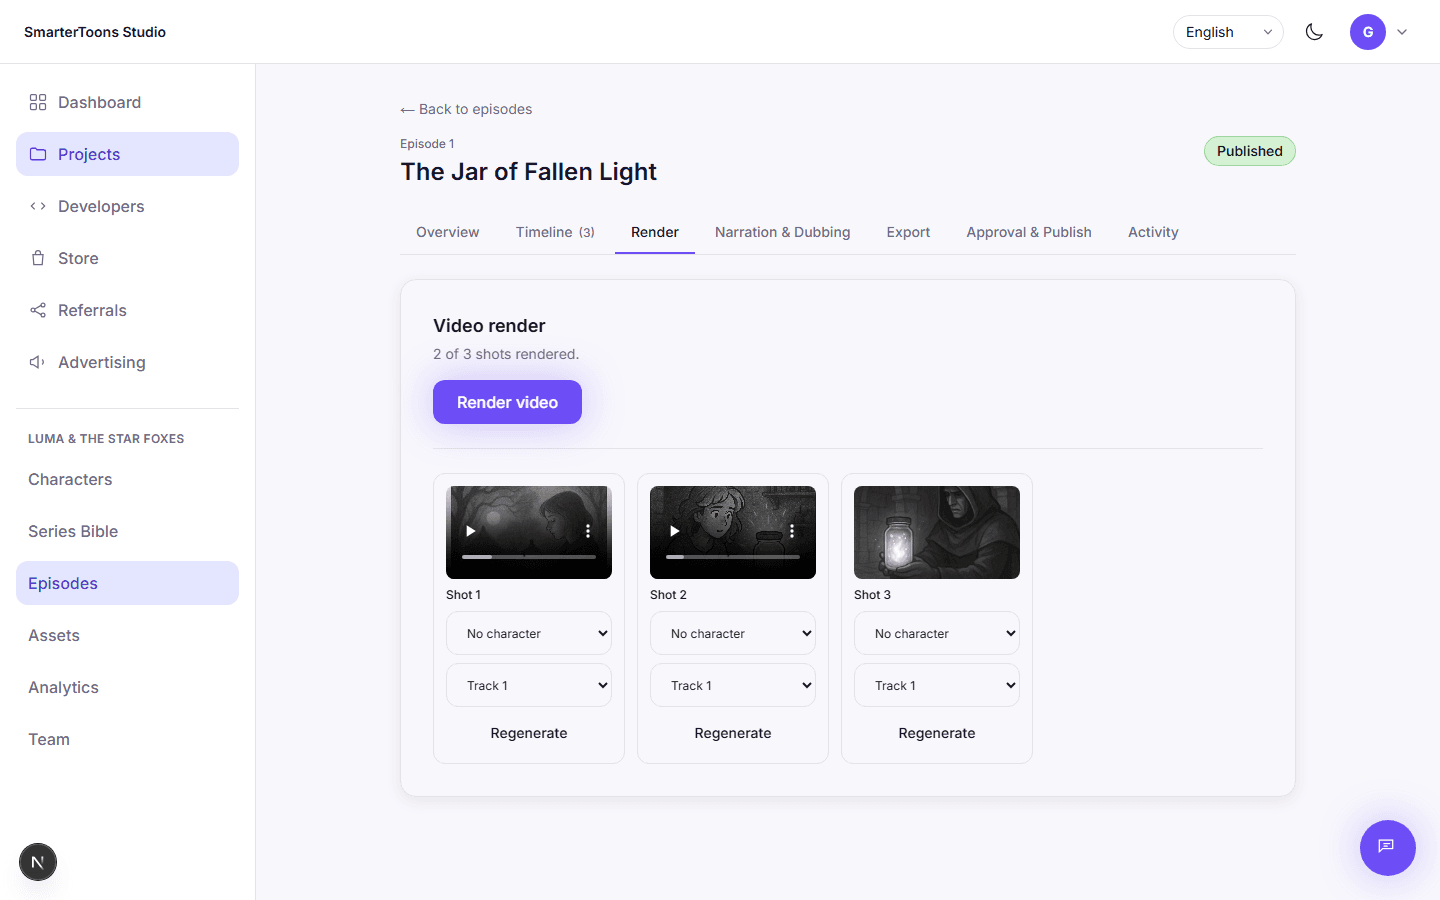
Rendering animates every storyboard image into real video, shot by shot. It's a separate, explicit step from generation — and the one place where iterating gets expensive, since it bills per shot rather than once per episode. A render already in progress is idempotent: re-triggering it never re-renders a shot that's already done, so you can safely retry if only some shots came through.
Narration and dubbing
Narration turns an episode's summary into a spoken English voiceover. Dubbing takes that same narration and redubs it into another language while preserving its timing — so a dubbed episode's audio still lines up with the video underneath it, rather than running long or short. You can dub into as many languages as you need, one request per language.
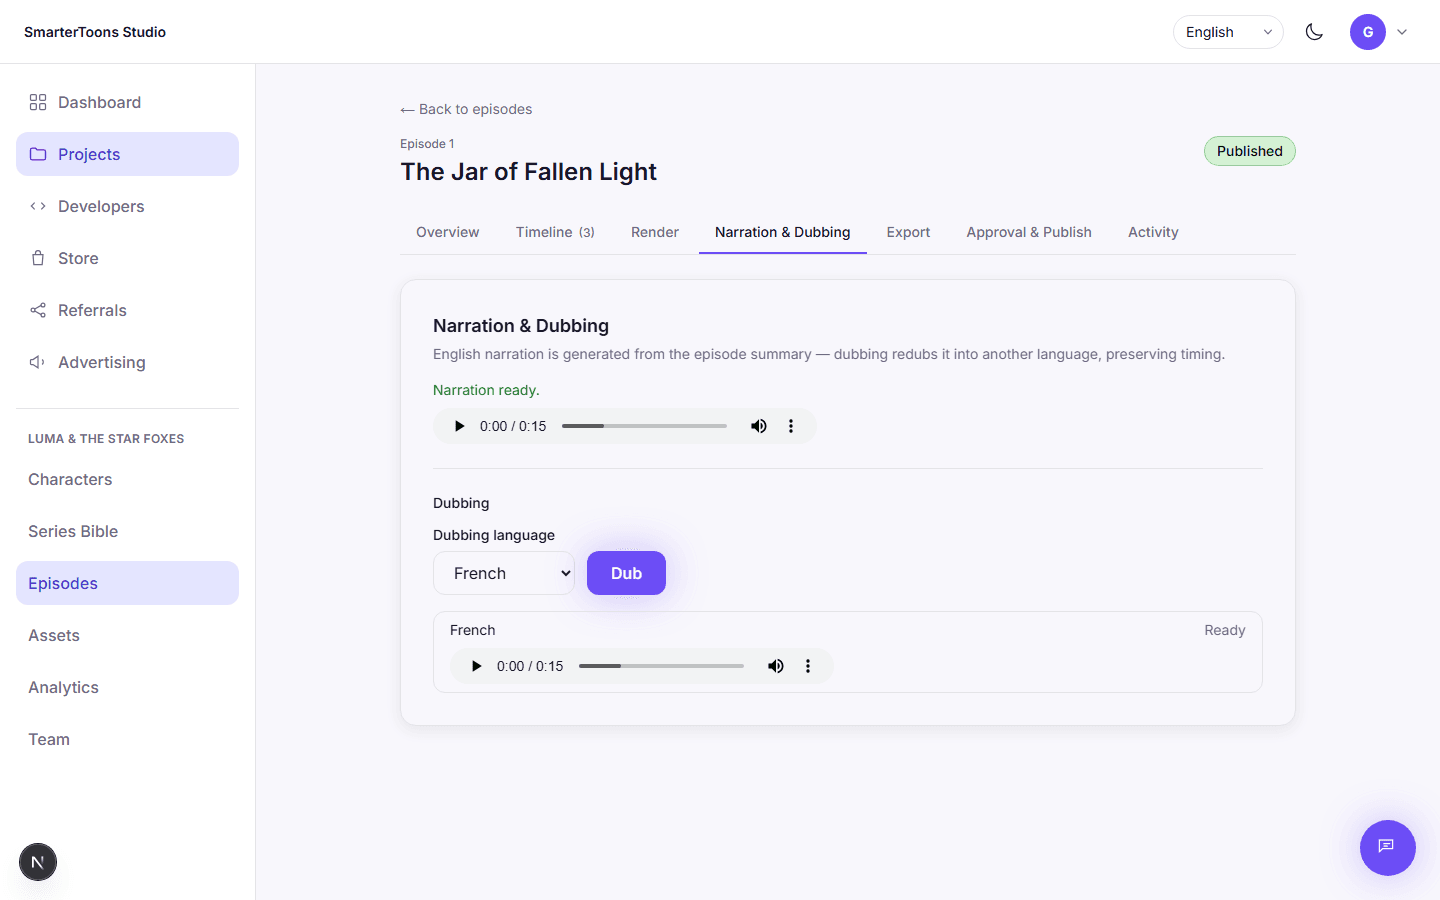
- 1Generate narration first — dubbing depends on it and will refuse to start without it.
- 2Pick a target language and request a dub — repeat for every language you want.
Approval and publishing
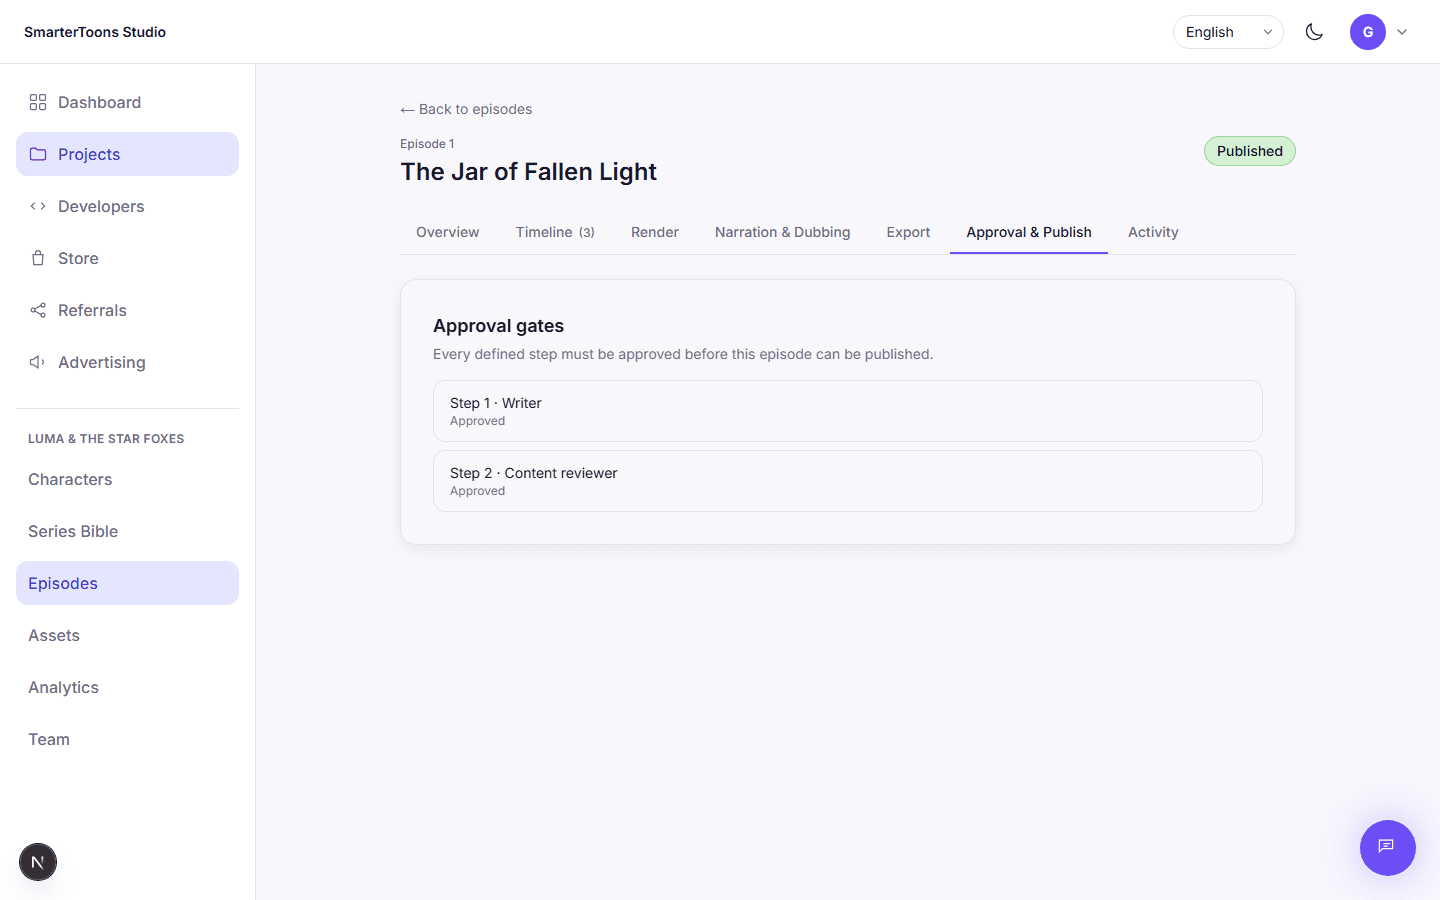
A universe can define an approval workflow — an ordered sequence of steps, each requiring sign-off from a specific team role (writer, animator, reviewer, and so on). If an episode has approval steps defined, every one of them has to be approved before it can be published; an episode with no steps defined can be published without conditions.
Publishing makes an episode visible to your audience. It's a deliberate, final action distinct from every step before it.
Exporting your episode
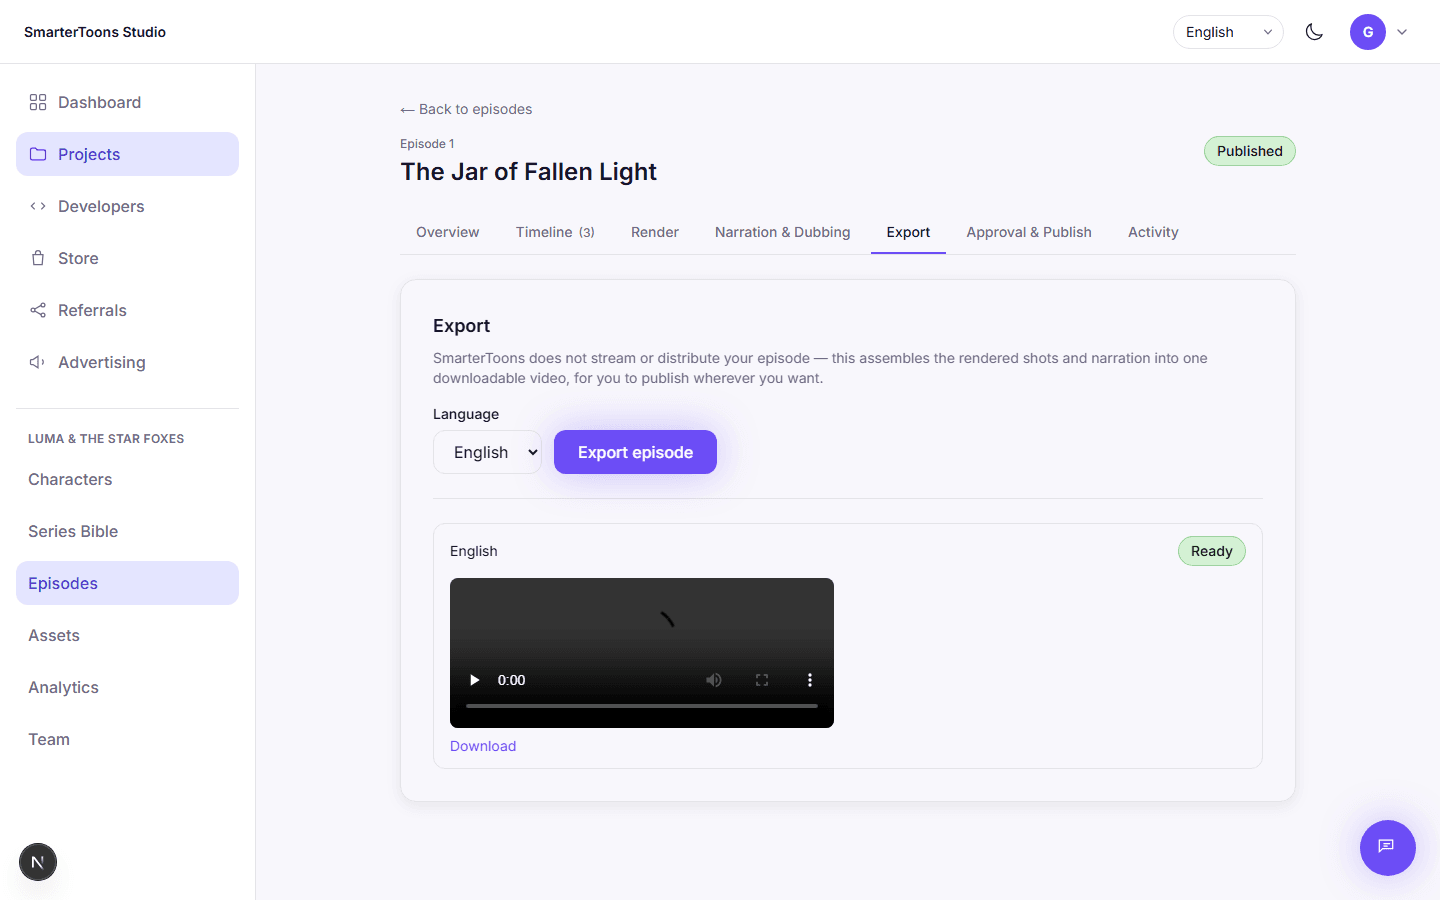
SmarterToons doesn't stream or distribute your episode itself — export assembles the rendered shots and narration into one downloadable video file, which you then publish wherever you actually want your audience to watch it. Exporting spends credits from your plan, the same way writing and rendering an episode do — it requires an active paid plan (Basic or Premium).
Assets, provenance, and rights
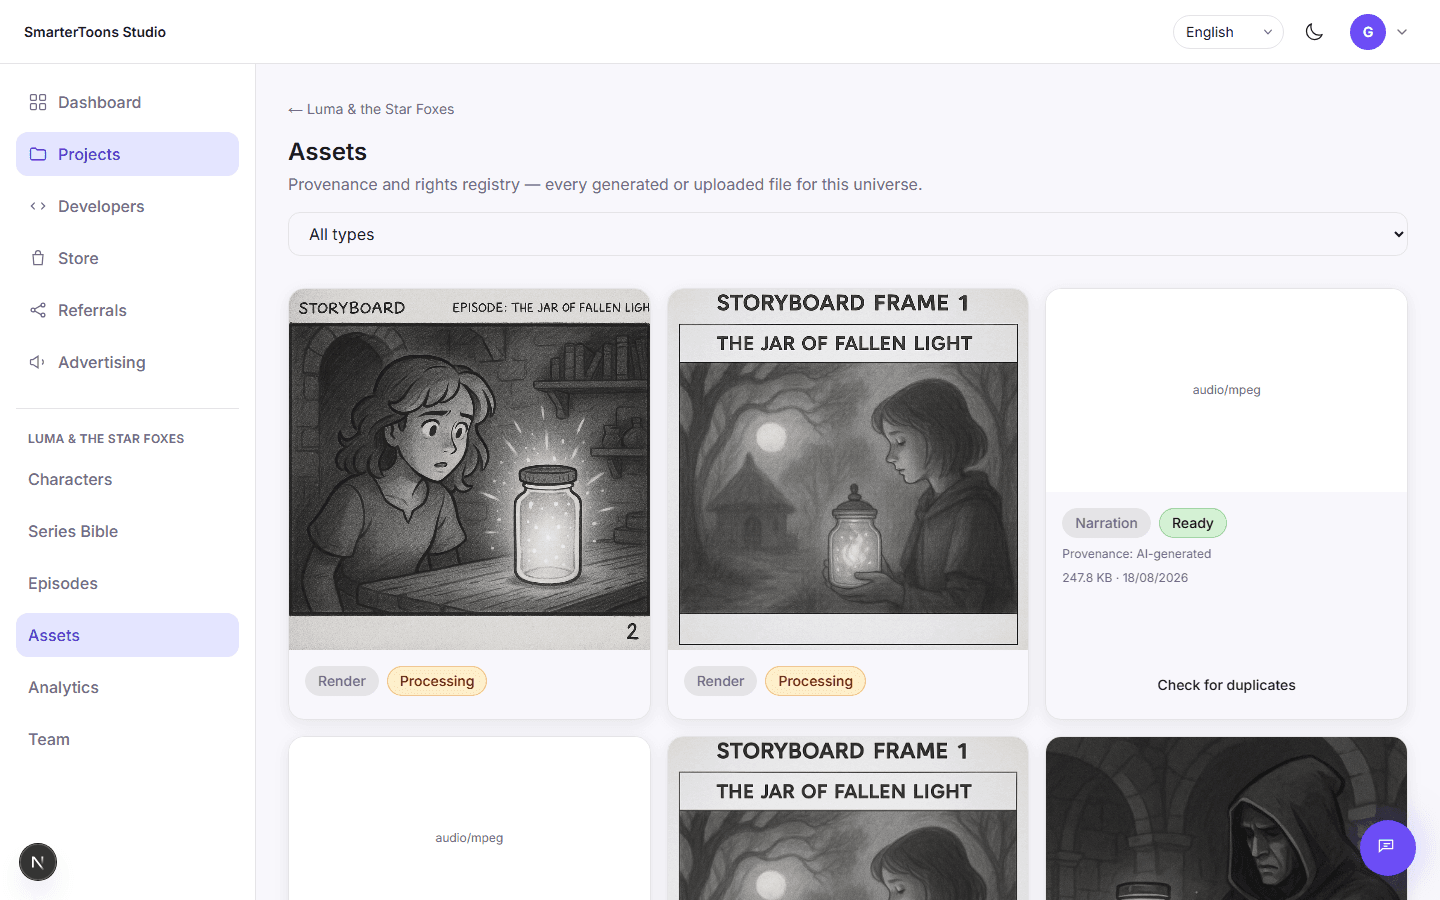
Every file your universe produces or you upload — reference images, storyboards, rendered video, narration audio — is tracked in one provenance and rights registry. Each asset records whether it was AI-generated, uploaded by you, or licensed, so you always know exactly where a piece of media came from.
A similarity check is available to flag exact duplicates already on the platform, useful before you upload a reference image you're not sure is original.
Analytics
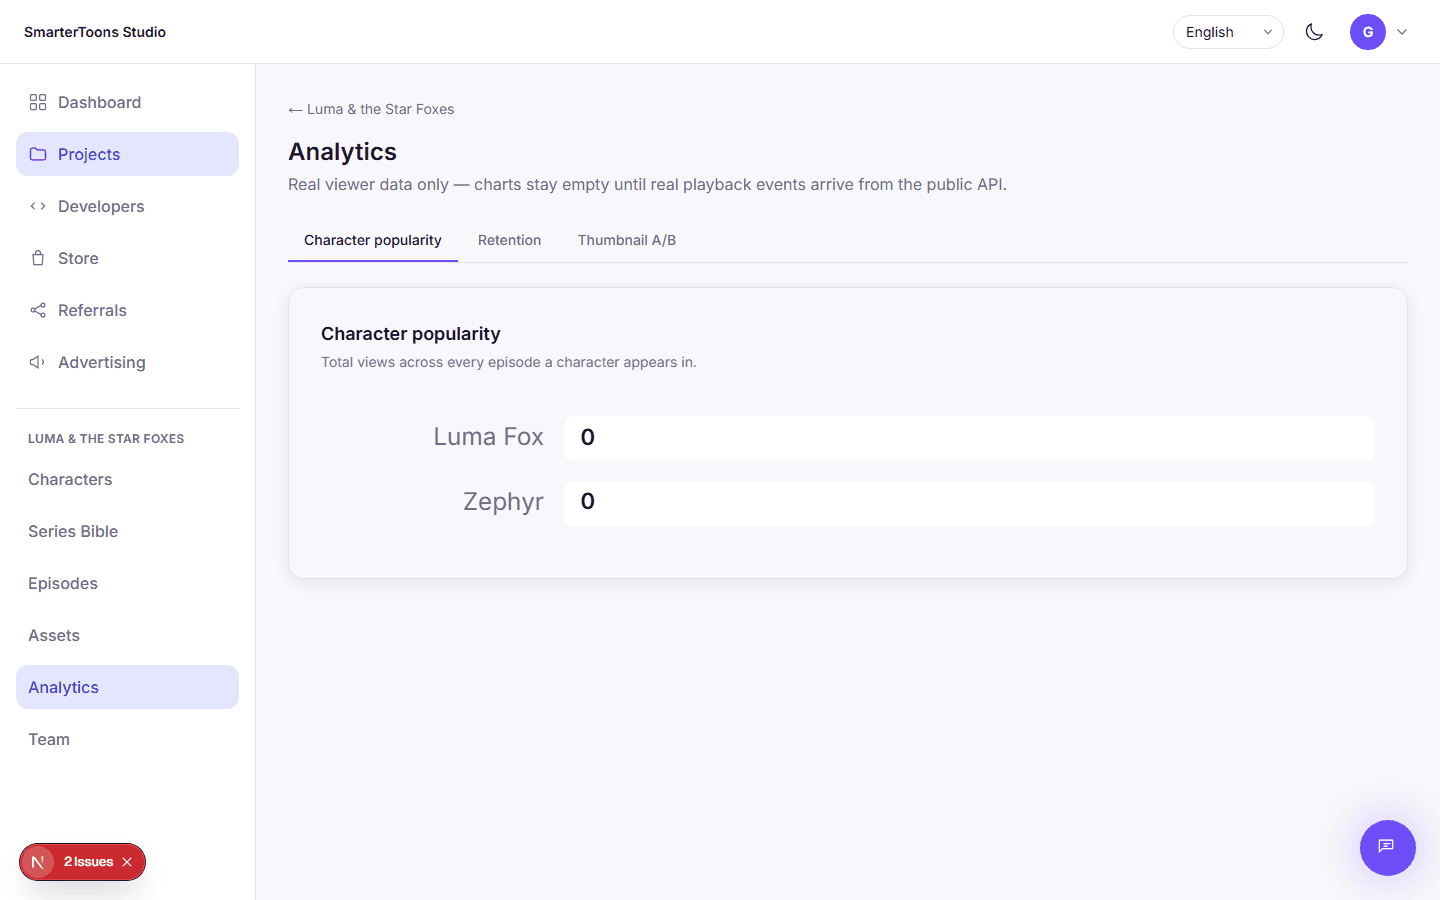
Once episodes are published and real viewers watch them, Analytics fills in with retention (how far viewers get through an episode before dropping off), character popularity across every episode they appear in, and thumbnail A/B results if you're testing more than one. It stays empty until there's real viewing data — nothing here is ever estimated or filled in artificially.
Team and collaboration
Invite writers, animators, and reviewers into a universe by email — they need an existing SmarterToons account. Each invitee gets one of those three project roles, which determines which approval steps they can sign off on. An invitation stays pending until the invitee accepts it from their own account.
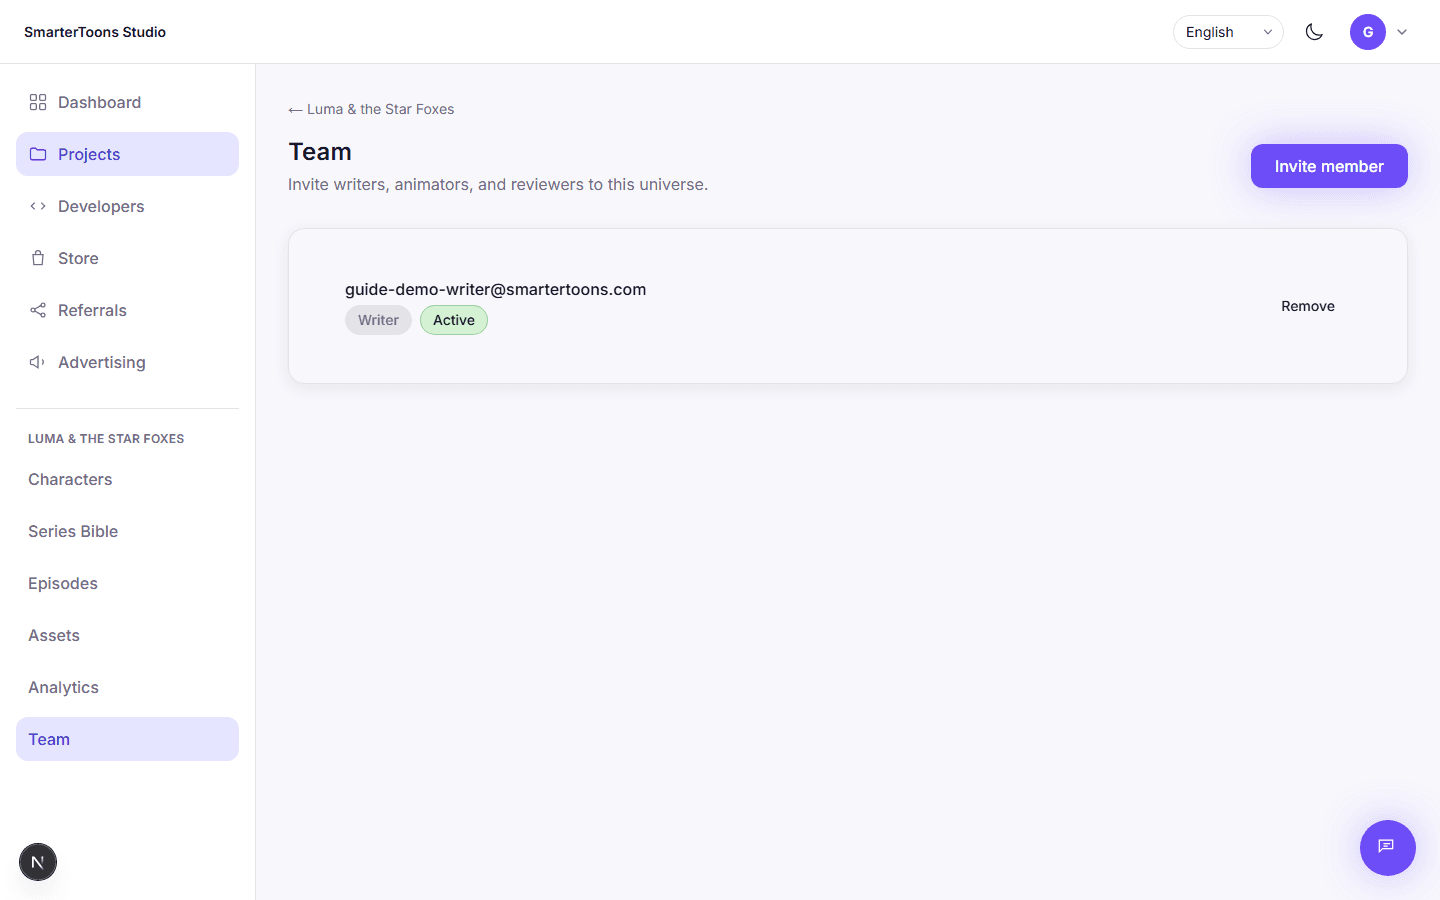
- 1Open a universe's Team tab and click Invite member.
- 2Enter their email and choose a role — writer, animator, or reviewer.
- 3They'll see the invitation on their own dashboard and can accept it from there.
The developer API
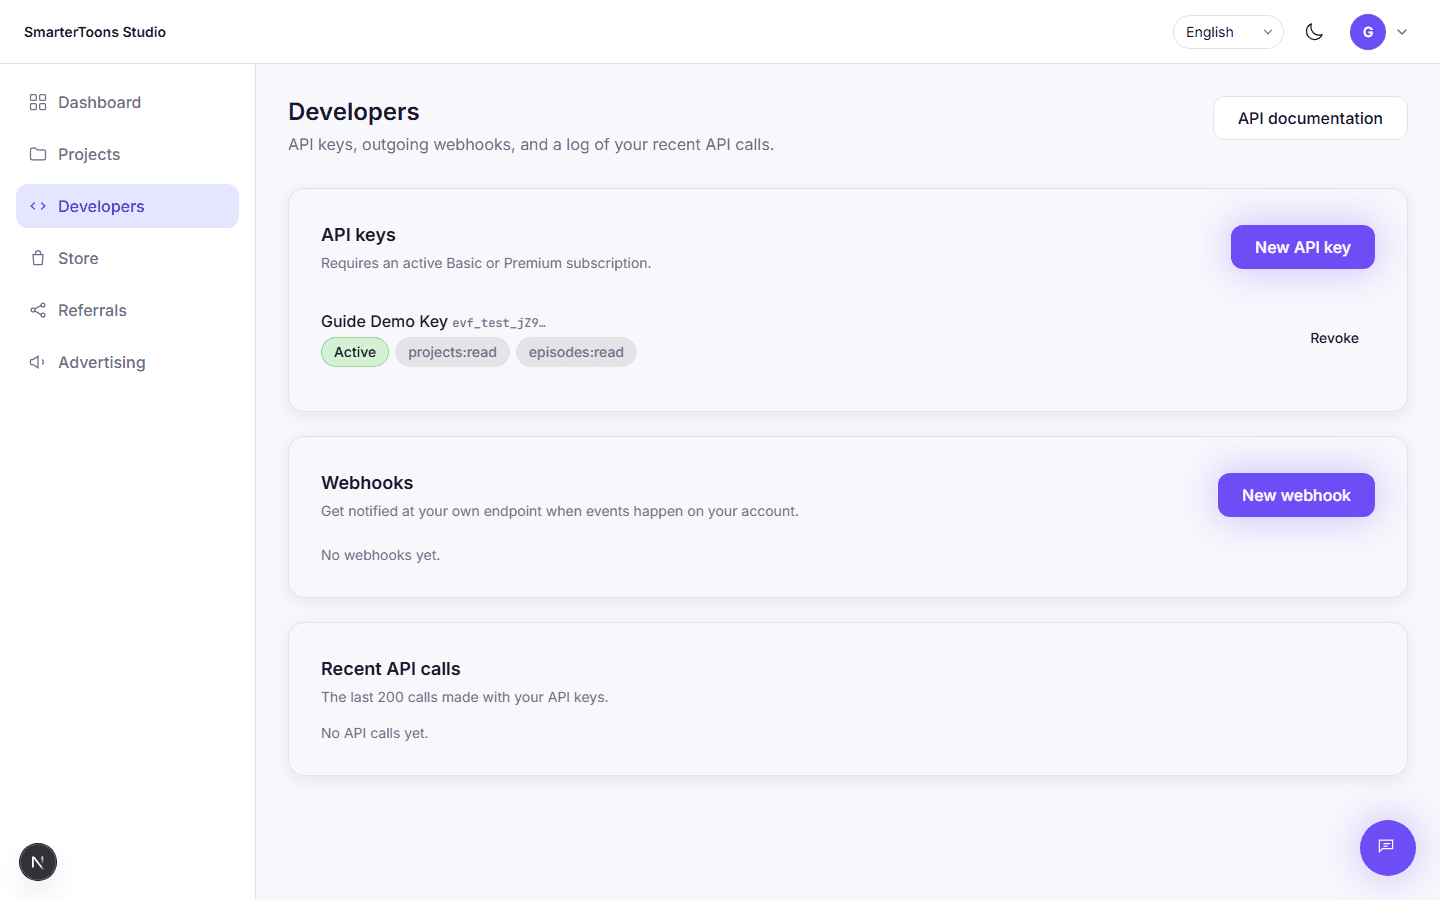
SmarterToons exposes a public REST API for reading your projects, characters, and episodes, and for recording analytics events — available to accounts on an active Basic or Premium subscription. Every key is scoped to only the permissions you select when you create it, and can optionally be marked sandbox, meaning it behaves like a normal key but never spends real credits — ideal while you're building an integration.
Outgoing webhooks let your own HTTPS endpoint get notified the moment something happens, instead of you having to poll the API. This page also keeps a running log of your most recent API calls.
Billing and your plan
The Billing page is where your subscription plan lives — separate from the Store, which sells one-off purchases (see below). Every account starts on the Free plan; Basic and Premium each raise your monthly credit allocation and your team's seat limit. Your current plan is highlighted, and switching to another one is a click away: pick a plan, confirm, and pay — the same payment flow used in the Store.
Credits from your plan are what most generation actions spend — writing an episode, rendering video, narration, dubbing, and exporting the final file. They're separate from anything you buy individually in the Store: a one-off credits top-up adds to the same balance, but a purchase like an extra character slot does not — each Store product grants exactly the kind of thing it says it does, nothing more.
This page also lists every invoice you've been charged and your full payment history, whichever gateway you paid through.
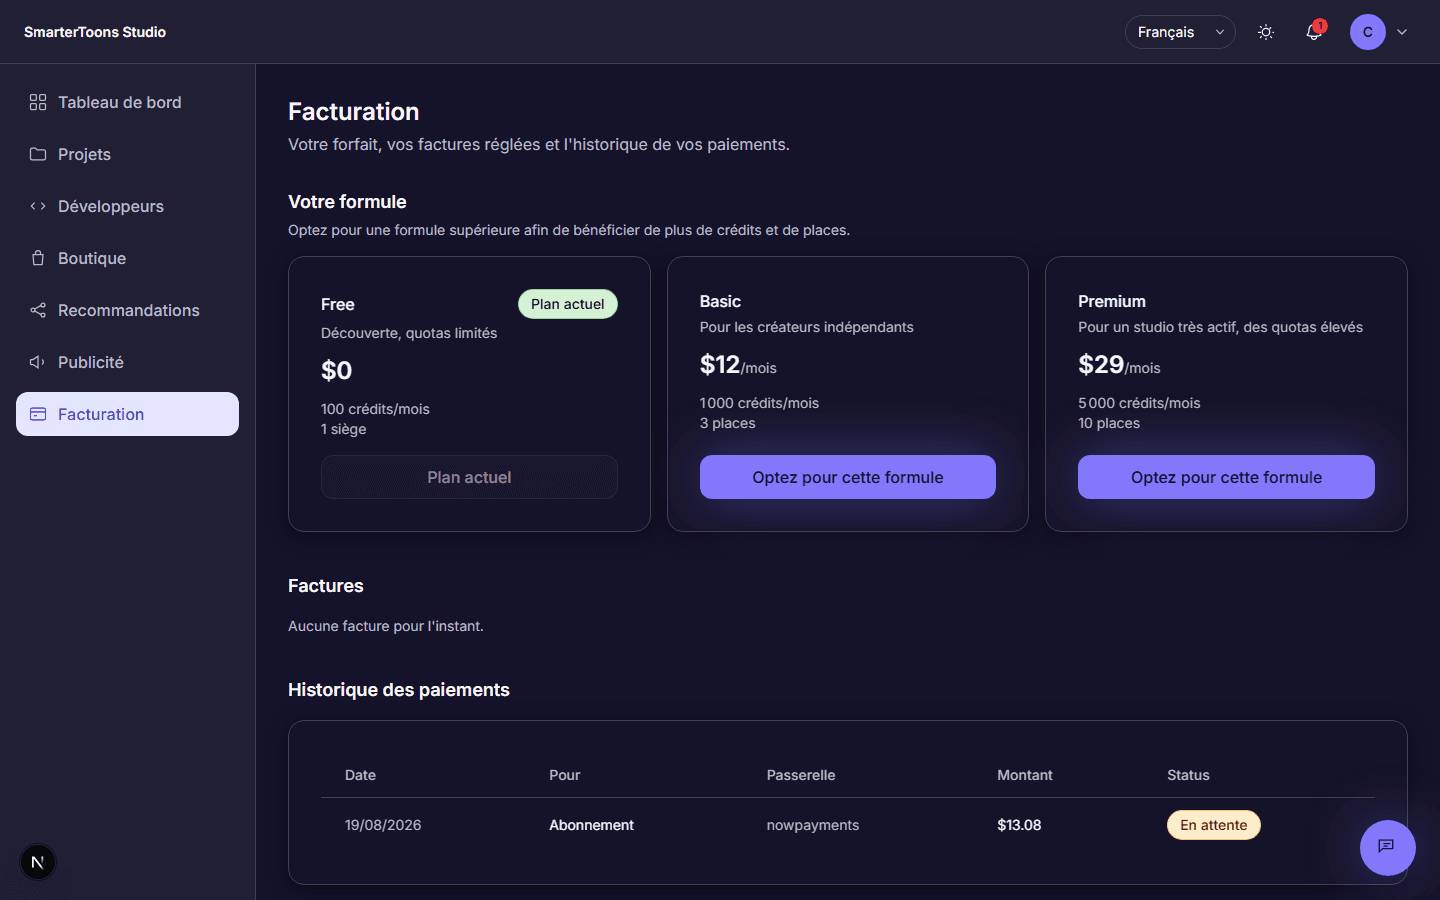
- 1Open Billing in the sidebar.
- 2Under Your plan, pick the plan you want and click to switch.
- 3Choose a payment method and confirm — a paid plan takes effect once the payment is confirmed.
The one-off store
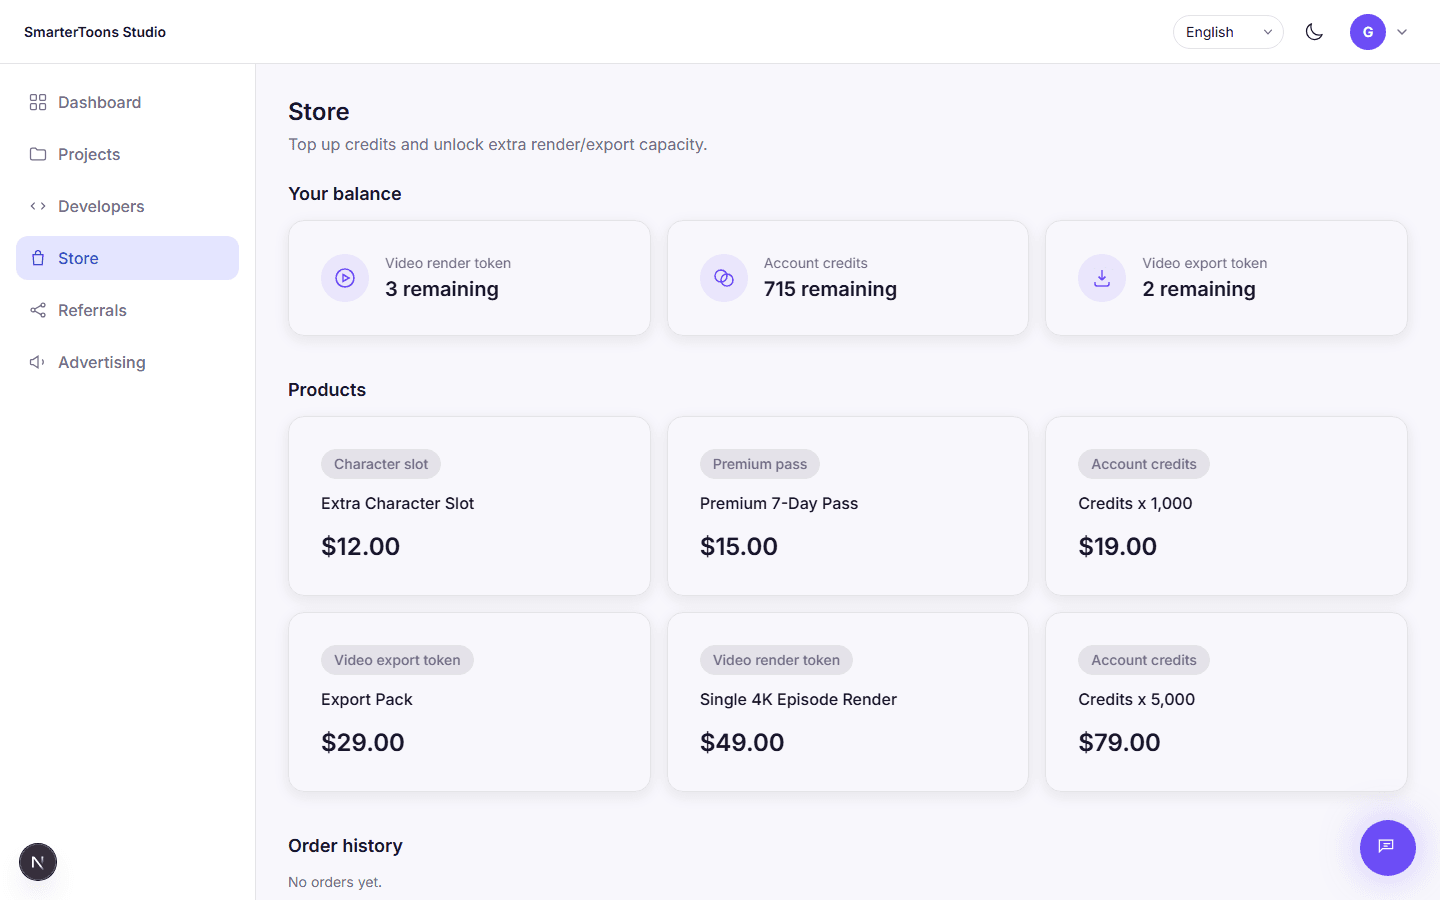
Alongside monthly subscriptions, the Store sells one-off purchases: extra credits, a short Premium pass, a single 4K episode render token, or an extra character slot. Pricing is set deliberately above the equivalent subscription usage, so a regular subscription stays the more rational choice for anyone using the platform consistently — the Store exists for occasional, one-off needs.
At checkout, there's a promo code field: enter someone's referral link code or custom coupon code there to get a discount on that purchase — see The referral program below for exactly how that works and what you get.
The referral program
Every account gets one personal referral link automatically at signup — no setup needed. From the Referrals page, you can also create your own coupon codes: a coupon is just an alternative, memorable code (like a name instead of a random string) that points back to you exactly the way your link does. There's no functional difference between them — both are simply ways for someone to identify you as their referrer, whether they click your link or type a code in by hand at checkout.
Whoever signs up through your link, or applies your link's code or one of your coupon codes in the promo code field when subscribing or buying from the Store, gets a fixed discount on that purchase — the rate is set platform-wide (currently 20%) and is exactly the same no matter which of your codes they used. As the code's owner, you then earn a commission on the net amount they paid. If you were yourself referred by someone else, that person also earns a smaller, second-level commission on the very same purchase — the chain never goes deeper than two levels.
The Your network list on this page shows everyone who signed up using your link or one of your coupons, so you can see who you've actually brought onto the platform, not just your click and signup counts.
A new commission starts out pending for a short retention window (to cover refunds or payment disputes) before it becomes payable. Once it's payable, request a payout to a wallet address directly from this page — an admin reviews and approves it from there.
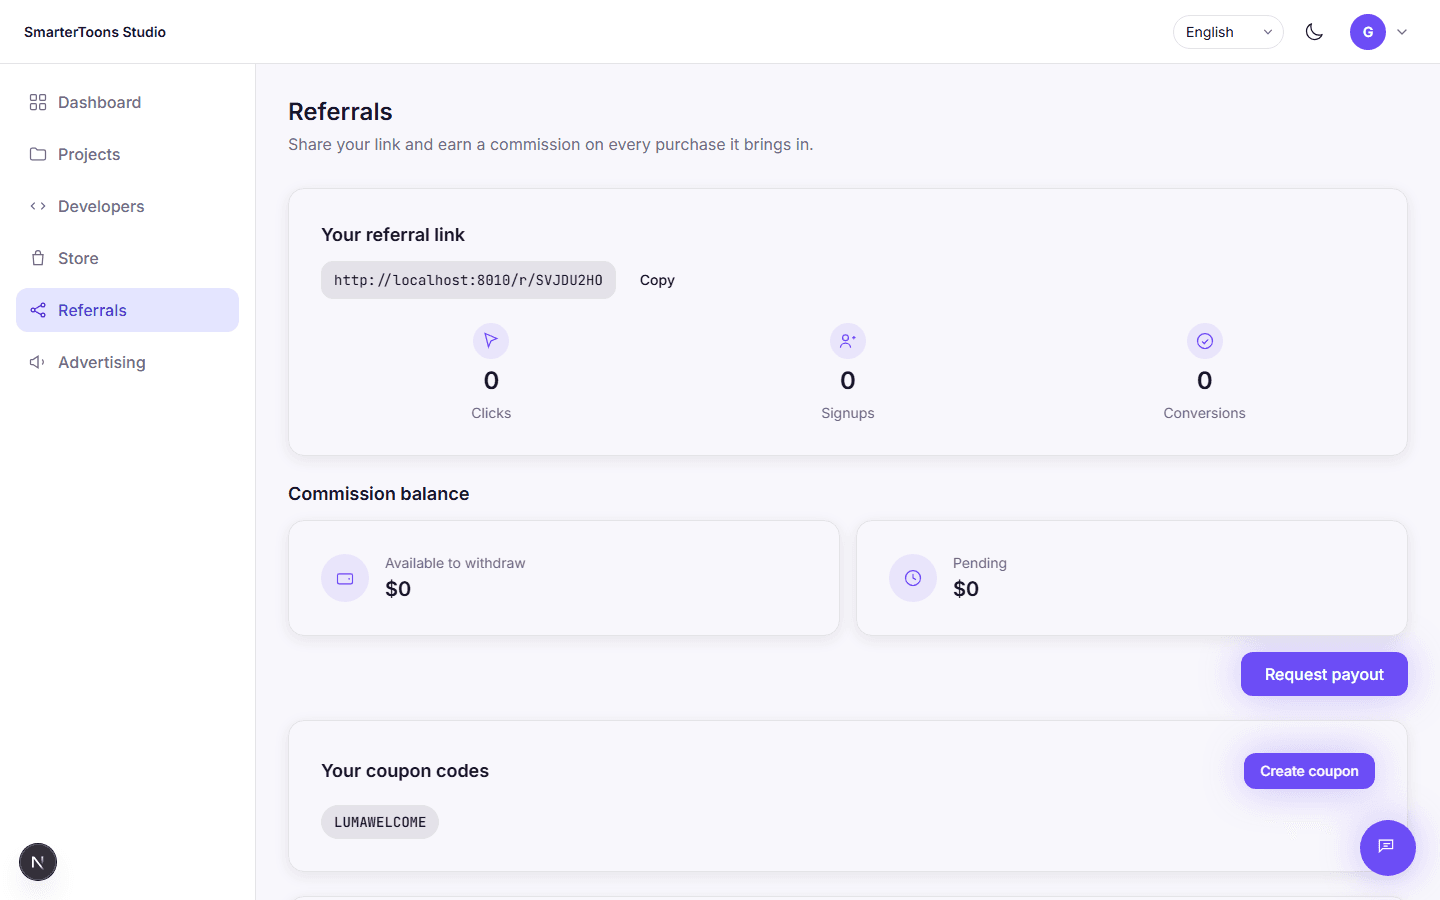
- 1Share your personal referral link, or create a custom coupon code, from the Referrals page.
- 2Anyone who signs up with your link, or enters your link's code or a coupon of yours at checkout, gets a discount — you earn a commission on what they paid.
- 3Once a commission becomes payable, request a payout to a wallet address.
Advertising with AdStudio
AdStudio is SmarterToons' own advertising marketplace: it sells ad placements on the SmarterToons site itself — home banner, sidebar, in-content, video pre-roll, and episode sponsorship slots — priced per thousand views, per click, or as a flat rate.
Every creative is screened automatically before it goes live: content is checked against a policy list, and the destination URL is scanned for threats. A clean creative goes live the moment it's paid for; a flagged link enters manual review; anything that fails outright is rejected automatically. A campaign that's already live can still be pulled later if it turns out to violate policy.
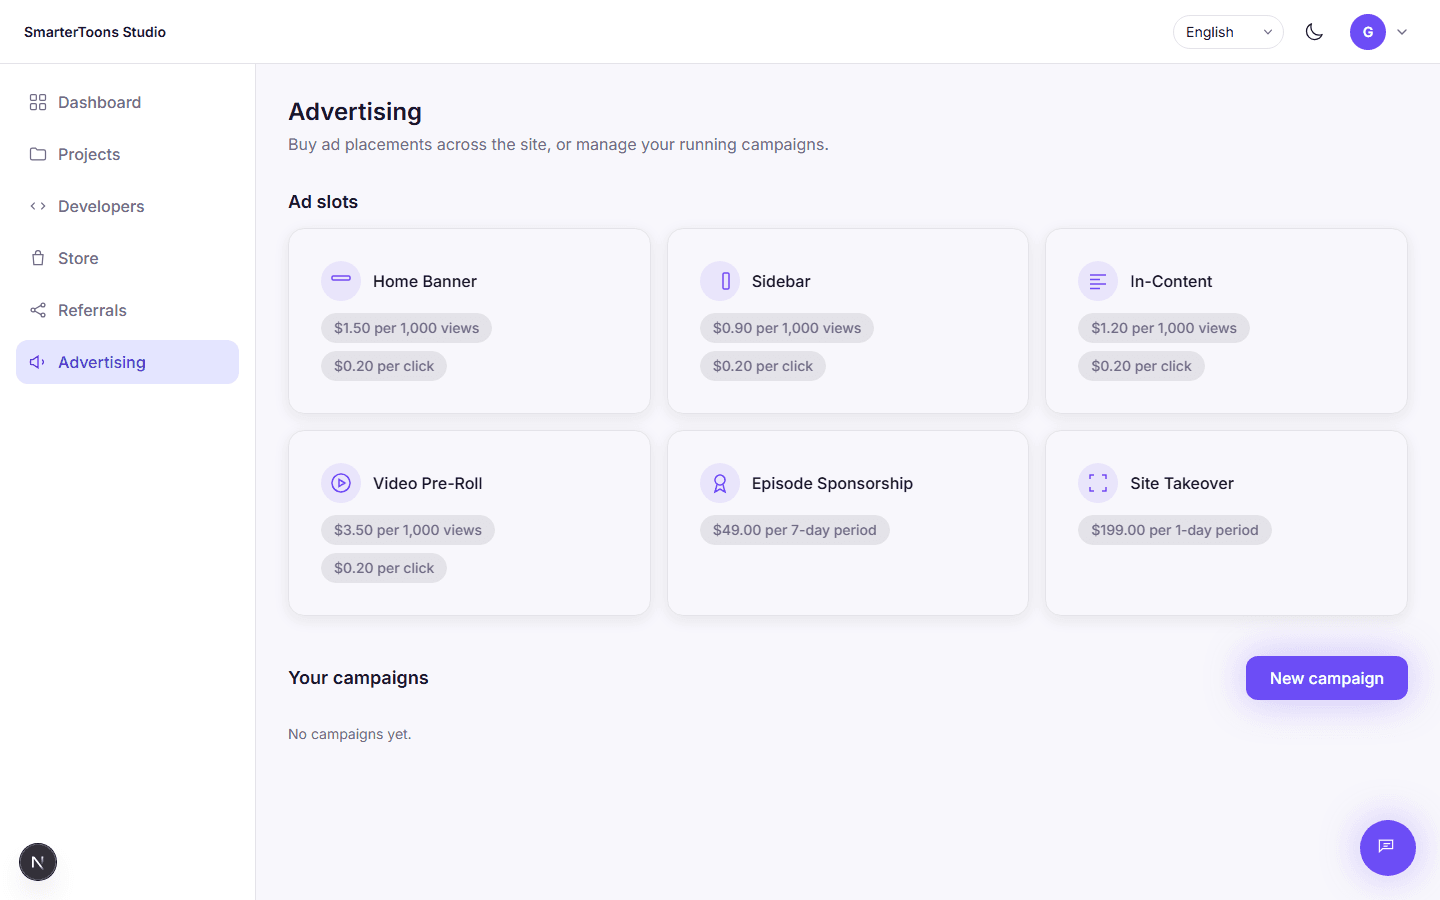
- 1Switch your account to advertiser from the Advertising page.
- 2Pick a slot and a pricing model, write your creative, and set a budget.
- 3Submit and pay — a clean creative goes live immediately.
The SmarterToons assistant
A floating assistant is available from every page in the Studio — the chat-bubble button in the bottom-right corner. It's a general-purpose, AI-powered assistant that knows how SmarterToons actually works end to end, so you can ask it anything about the platform, or about anything else, in plain language instead of hunting through documentation.
It only shows you real information: it never invents figures. If you're an admin or owner, it can also answer questions about your business's real numbers — regular accounts never see that data, even by asking.
Account and security
The Settings page covers your email, your interface language, and your password. To change your password, you need to enter your current one first — there's no way around that, even if you're already signed in.
Two-factor authentication is available and optional: enabling it walks you through scanning a QR code with an authenticator app, and gives you one-time backup codes to save somewhere safe in case you ever lose access to that app. Once it's on, every login asks for a fresh 6-digit code in addition to your password.
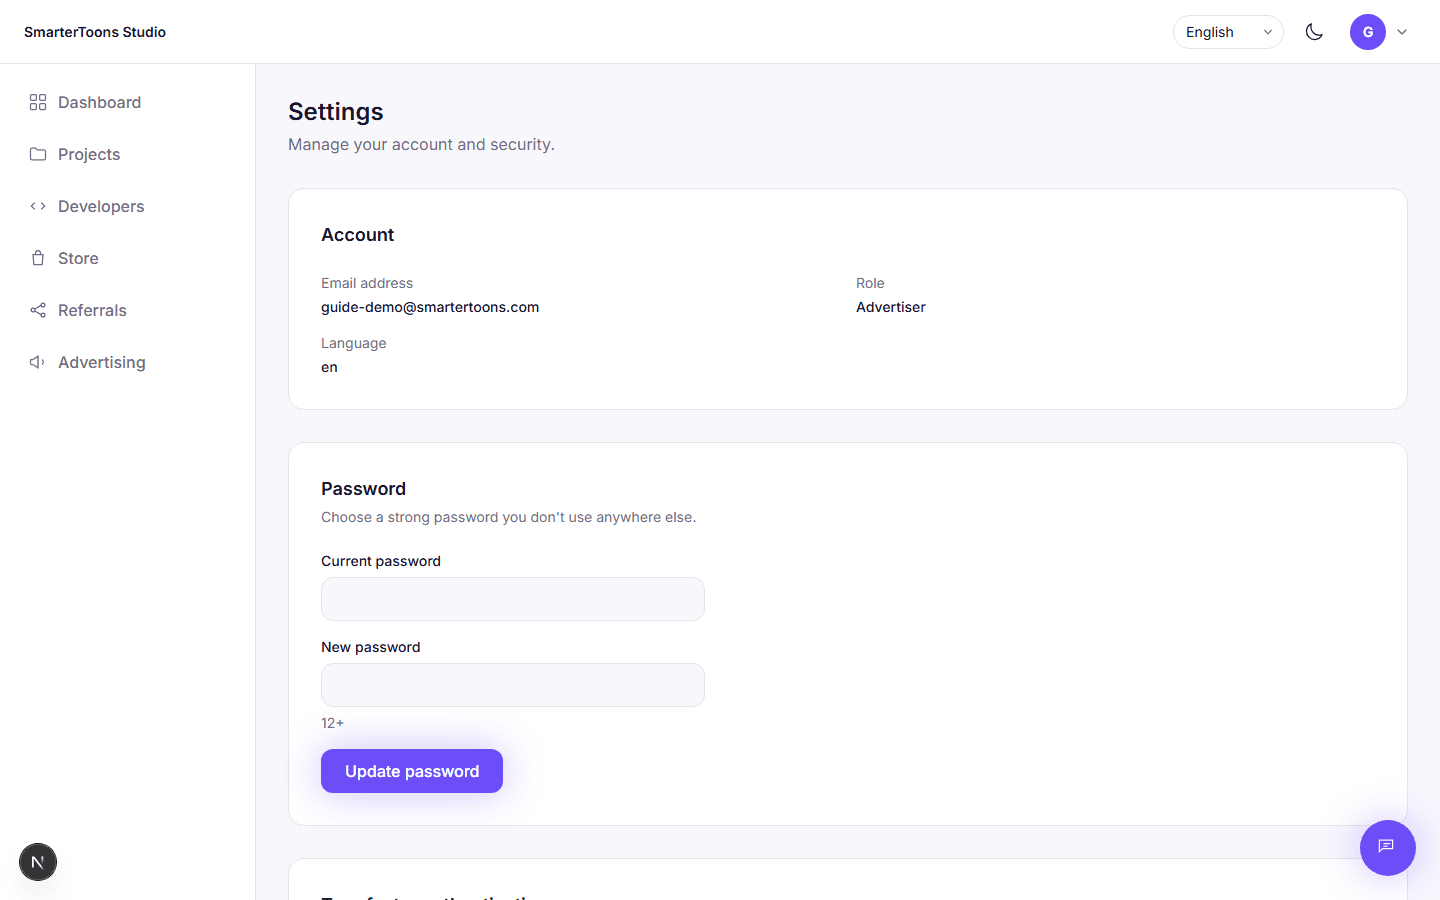
- 1Open Settings from the account menu, top right of any Studio page.
- 2Under Password, enter your current password and the new one, then confirm.
- 3Optionally, under Two-factor authentication, click Enable and scan the QR code with an authenticator app (Google Authenticator, Authy, 1Password, and similar all work).
- 4Save your backup codes somewhere safe — they're shown only once, and they're the only way back in if you lose your authenticator app.